Dr. Giacomo Fabbri

Nobel Biocare N1™ system

Immediate placement and loading of a single tooth restoration in the premolar area

Dr. Giacomo Fabbri, Italy
 

Case courtesy of Dr. Fabbri

Patient: 51-year-old female, smoker

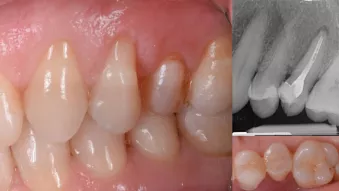
Clinical situation: Intraoral examination revealed no clinically significant findings with the exception of the maxillary second premolar (Universal Numbering System 13), previously endodontically treated with radiographic and clinical signs of a vertical root fracture. 

Surgical solution: Considering the favorable soft tissue volume and architecture and intact buccal bone, it was decided to proceed with an immediate implant placement and temporization.

Restorative solution: Immediate temporization using a digital workflow with TempShell at the N1 base level.Final restoration was fabricated from full-contour zirconia using a Universal Abutment at the N1 base level.

Surgery date: February 2021

Total treatment time: 12 weeks

Tooth position: 25


Case courtesy of Dr. Giacomo Fabbri.

Some products may not be regulatory cleared/released for sale in all markets.

Please use landscape mode when viewing this page on mobile.

Surgical procedure

Implant preparation

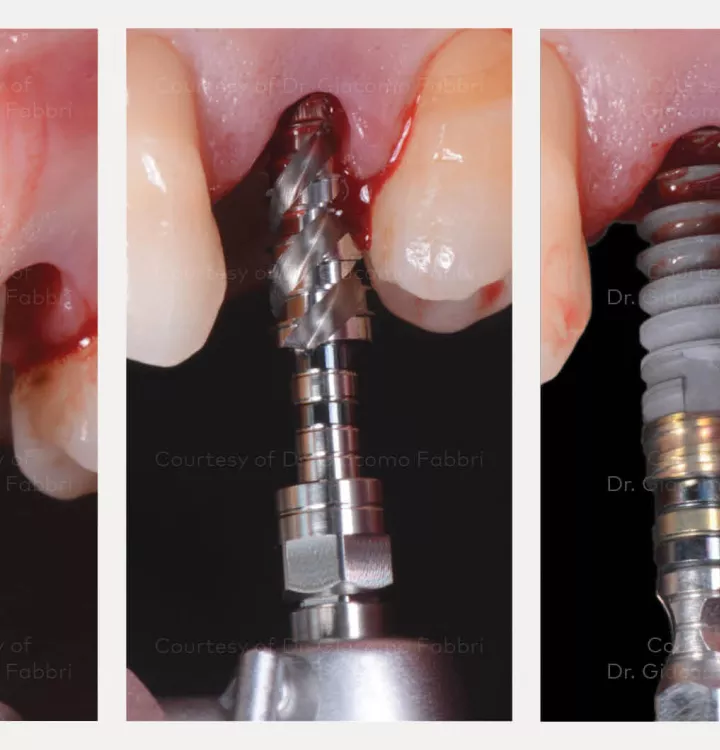
After tooth extraction the implant site was prepared in accordance with the manufacturer's instructions for the Nobel Biocare N1 Implant system. The pilot osteotomy was created with the OsseoDirector™, then the final osteotomy was created with the OsseoShaper™ to a torque of 23 Ncm. An N1 RP 13 mm implant was placed achieving 51 Ncm of final implant insertion torque.

Surgical procedure

Implant placement

The implant was placed approximately 3.5 mm below the buccal free gingival margin. The flat side of the trioval was placed on the buccal aspect in accordance with the manufacturer's instructions (left).

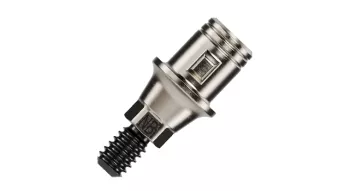
The Xeal™ N1 Base RP 1.75 mm was placed immediately after the implant placement and tightened to the final torque of 20 Ncm (right).

Surgical procedure

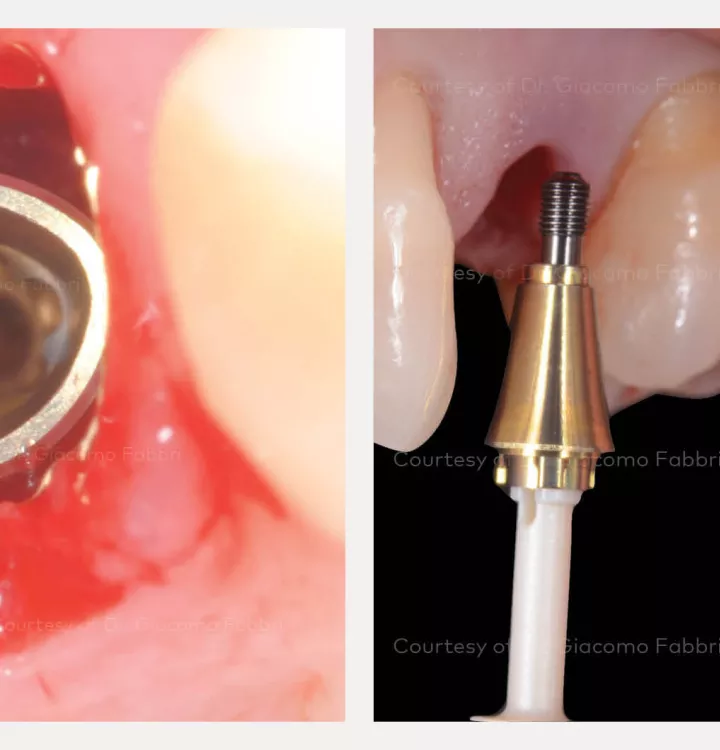
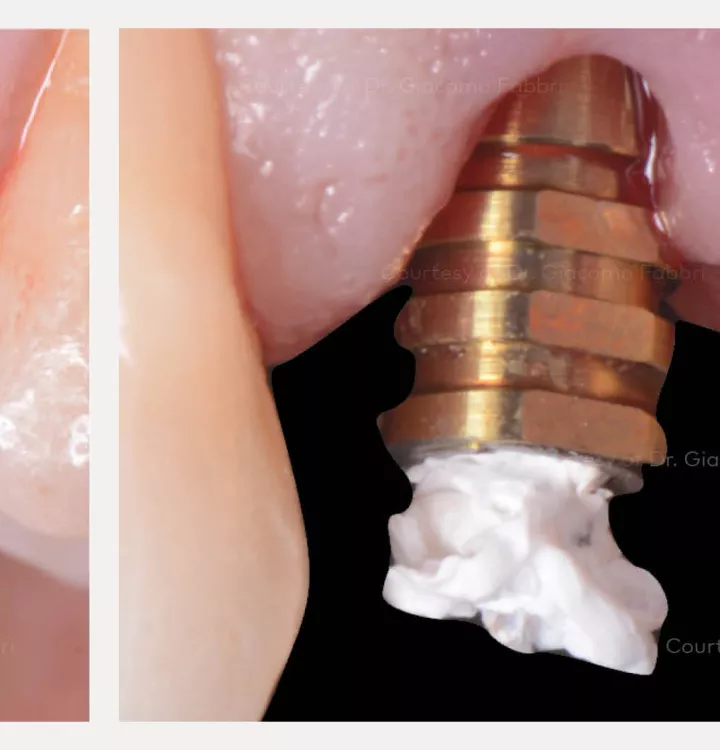
N1 dental implant placed with plastic handle

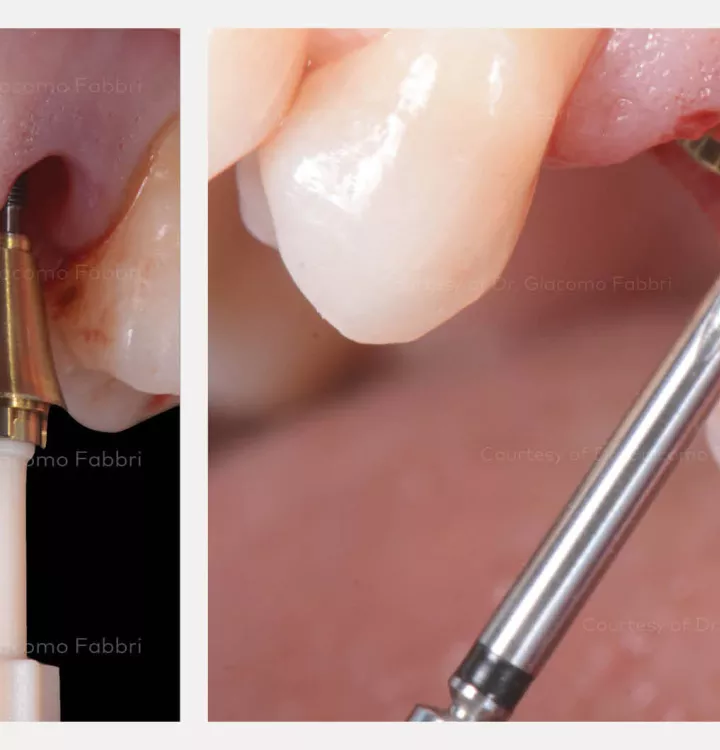
The N1 Base was placed using a plastic handle, then once in situ the final torque was achieved using the N1 Base screwdriver attached to the dedicated prosthetic torque wrench.

Surgical procedure

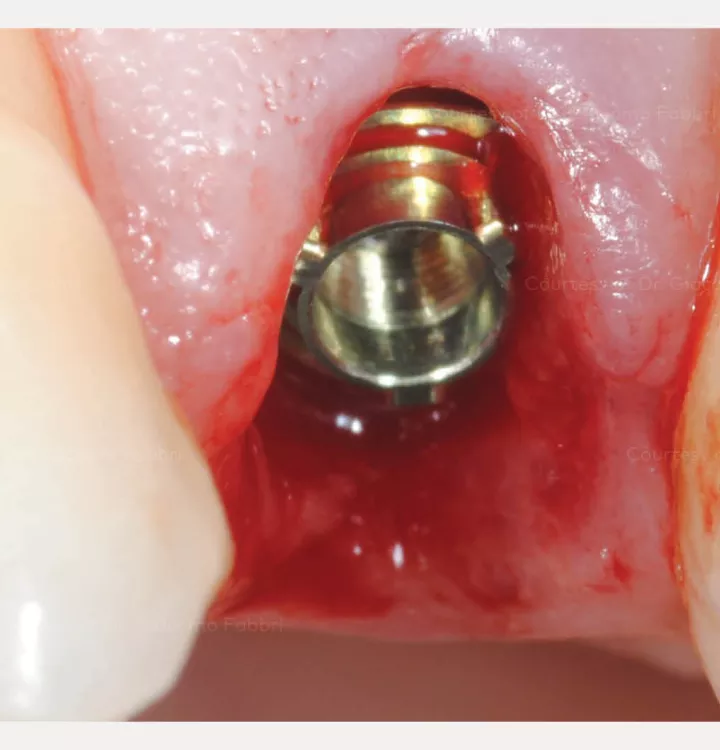
N1 dental implant in situ

N1 Base in situ. The new trioval prosthetic platform is located about 1.75 mm below the buccal soft tissue level.

Surgical procedure

Placement of N1 Base temporary abutment

N1 Base titanium temporary abutment was placed in order to proceed with an immediate temporization using the fully digital workflow of a TempShell provisional. The screw access channel was closed with Teflon in order to protect the screw head during the restorative procedure.

Surgical procedure

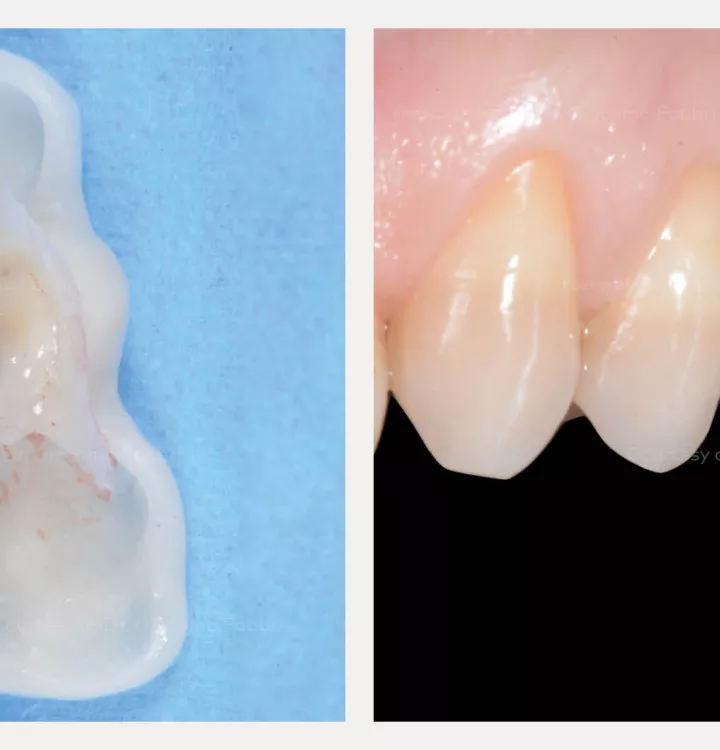
Temporary abutment is fixed to the tempshell

The temporary abutment was fixed to the TempShell using flowable composite. The temporary restoration was then placed in situ and tightened to 20 Ncm with Omnigrip Mini. The clinical view shows the result immediately after the surgery.

Surgical procedure

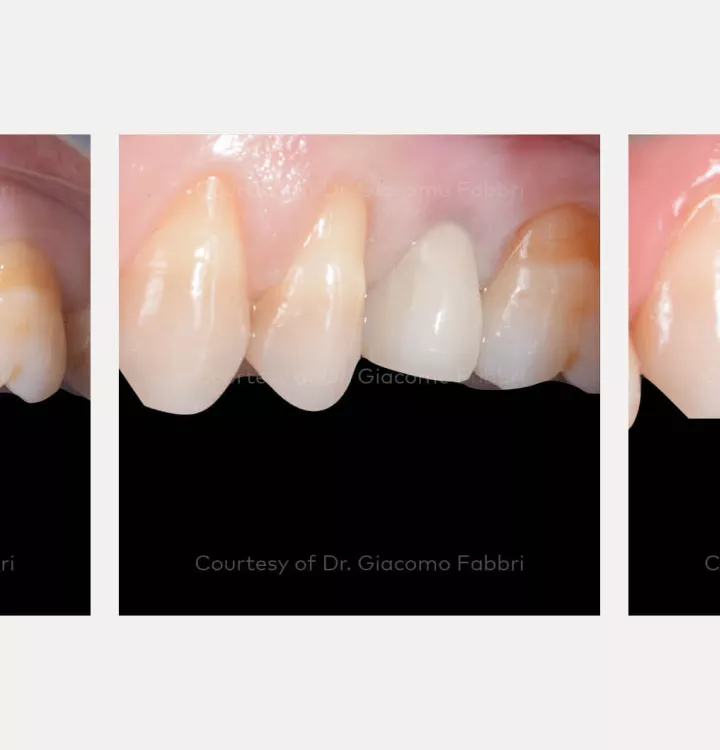
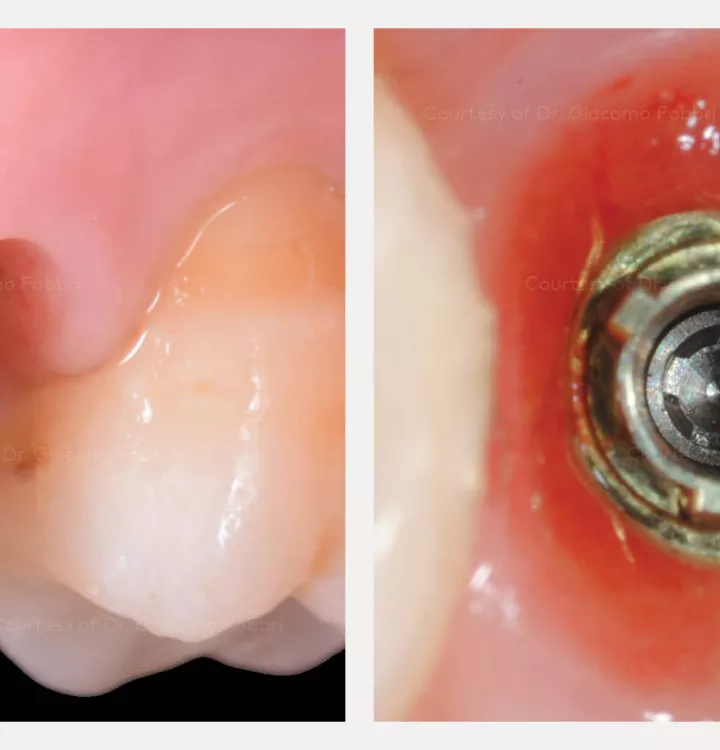
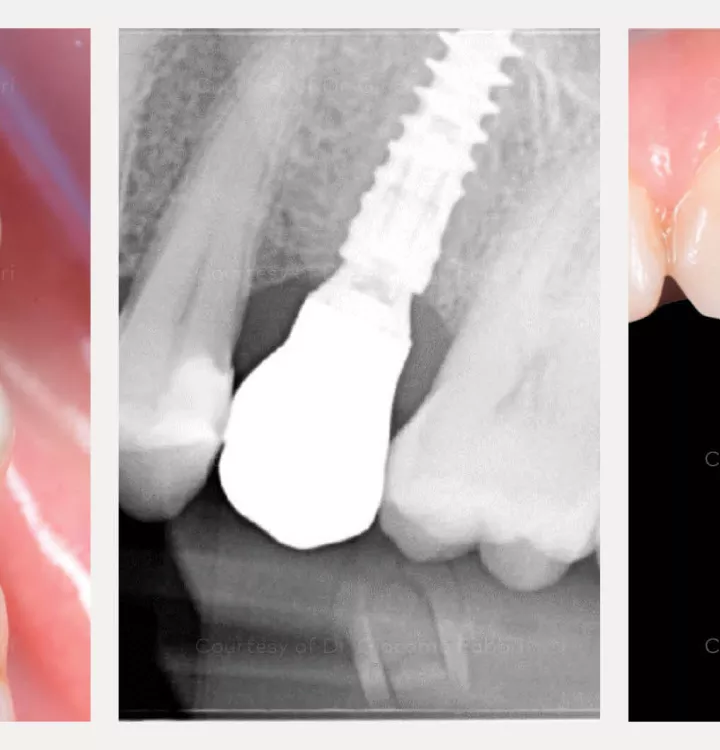
Clinical view (Day 0, 4 weeks and 10 weeks after surgery)

Clinical view immediately after the surgery (left).

Clinical view at 4 weeks after the surgery (center)

Clinical view 10 weeks after the surgery (right). Note the excellent tissue stability and appearance.


Surgical procedure

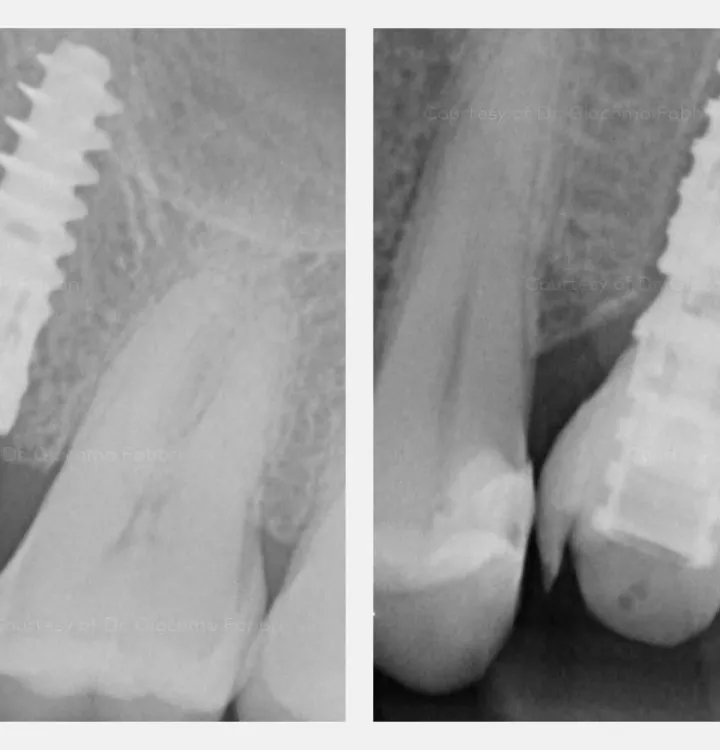
X-ray evaluation after the surgery

X-ray evaluation immediately after the surgery (left).

X-ray evaluation 10 weeks after the surgery (right).

Surgical procedure

Temporary restoration removal

The temporary restoration was removed 10 weeks after the surgery to take the final impression. Soft tissue volume, morphology and quality appeared stable and healthy (left).

Occlusal view of the clinical situation 10 weeks after the surgery (right).

Restorative procedure

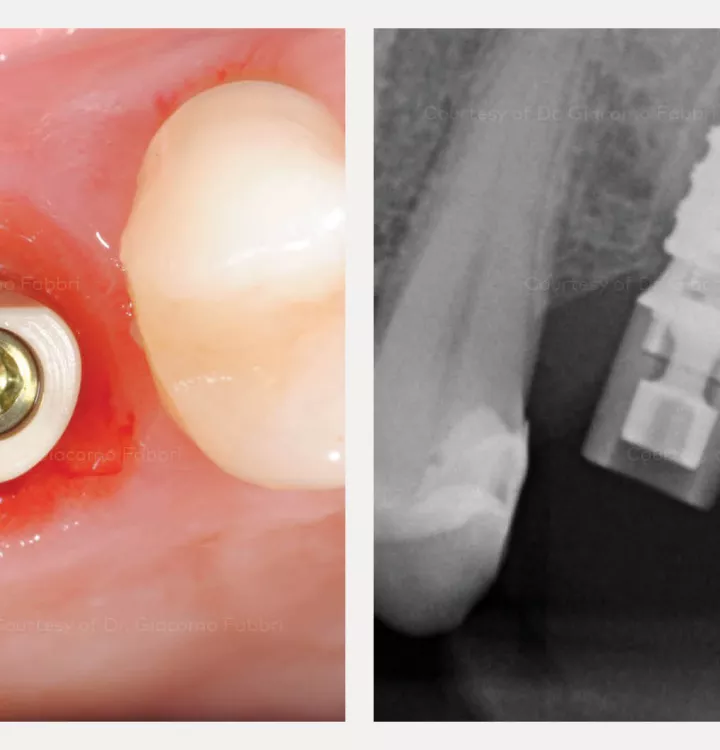
IOS abutment in situ

Final impression was acquired using an intraoral scanner and the IOS Healing Abutment N1 Base. Clinical view and the X-ray show the IOS abutment in situ.

Restorative procedure

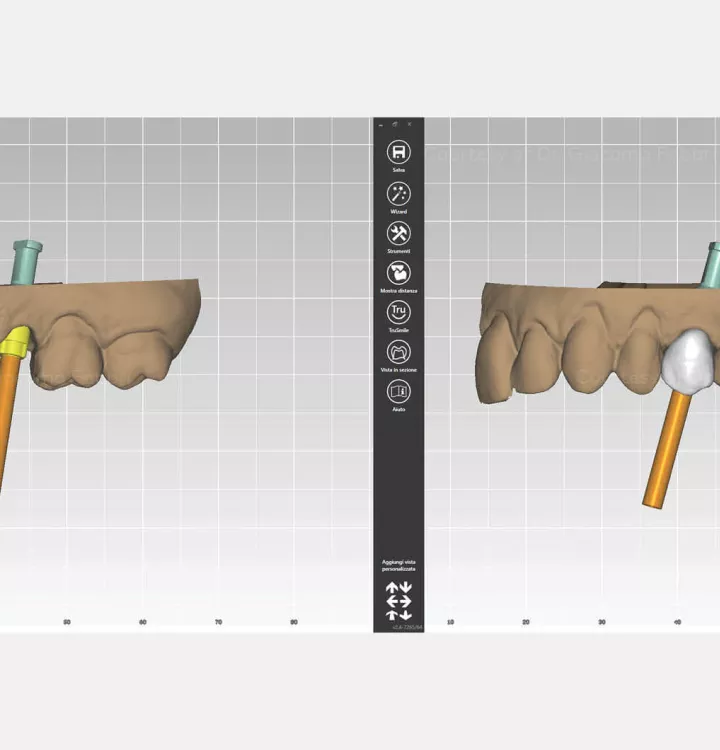
Design and planning of final dental restoration with DTX Studio Implant

The final restoration on a Universal Abutment was designed and planned using DTX Studio™ Lab.

Restorative procedure

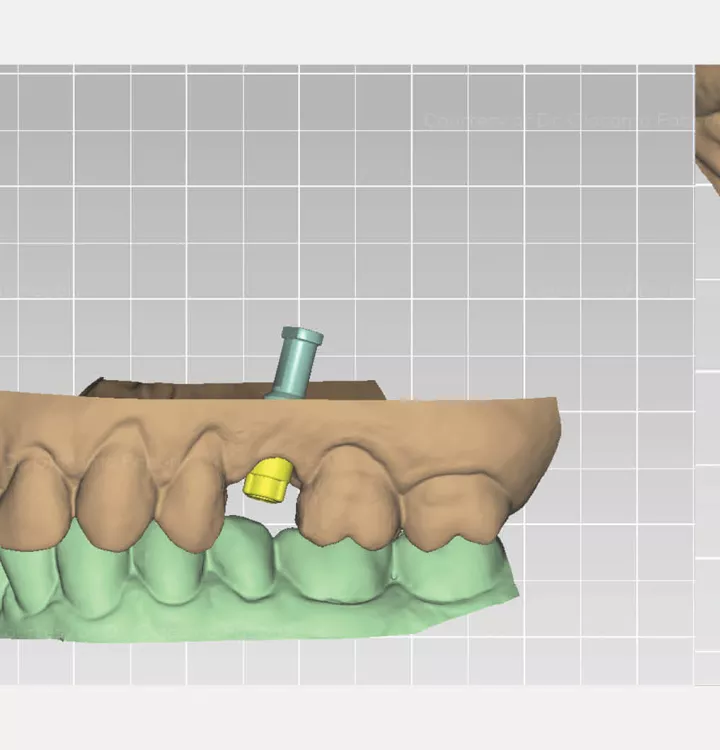
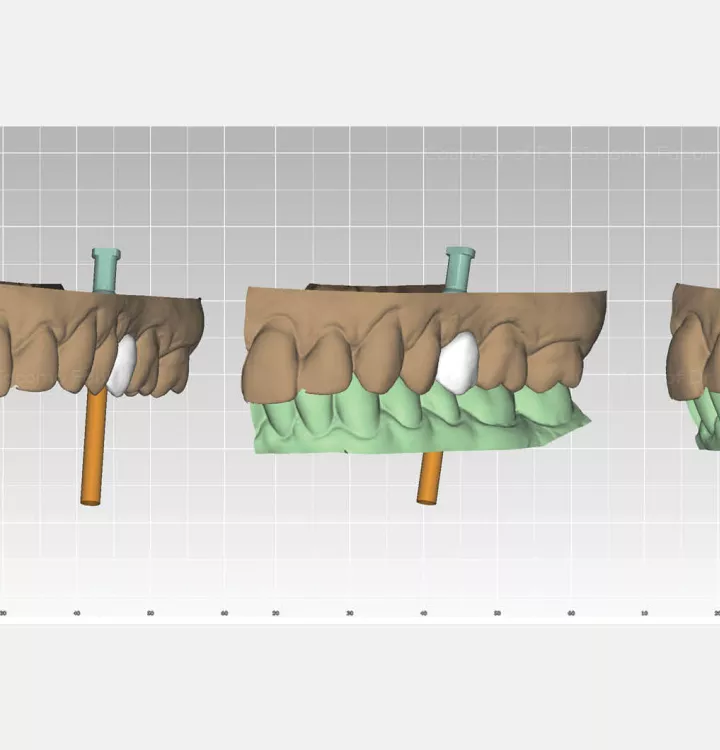
Designing and planning of final implant restoration using DTX Studio Implant and universal abutment

The final restoration was designed and planned using DTX Studio software and the Universal Abutment.

Restorative procedure

Design and planning of final dental restoration with DTX Studio Implant

The final restoration was designed and planned using DTX Studio software and the Universal Abutment.

Restorative procedure

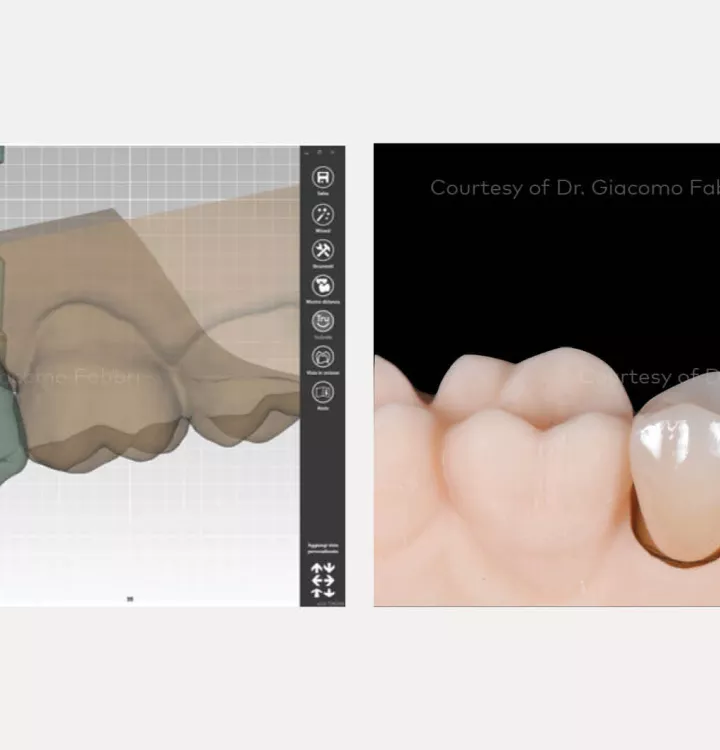
Design and plan by DTX Studio Implant

The final restoration was designed and planned using DTX Studio software and the Universal Abutment (left).

A NobelProcera® full-contour zirconia crown was cemented in the lab on the Universal Abutment in order to obtain a final screw-retained restoration (right).

Restorative procedure

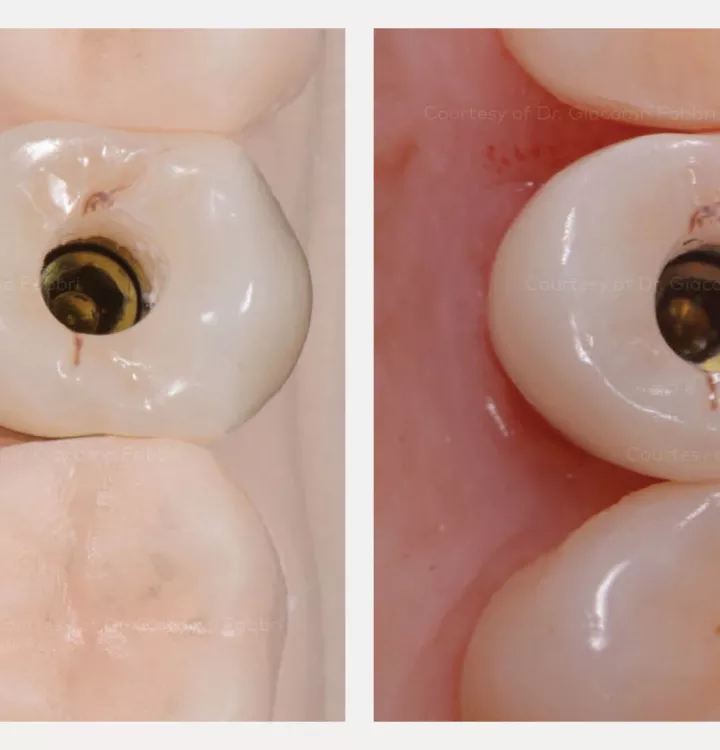
Occlusal view of the restoration on the 3D printed model and intraoral.

Occlusal view of the restoration on the 3D printed model and intraorally.

Outcome

Clinical views and X-ray show an excellent integration and stability.

Final result: Clinical and radiographic evaluation showed excellent marginal bone levels with ideal and stable soft tissue architecture. The screw access channel was closed with Teflon and composite.

Outcome

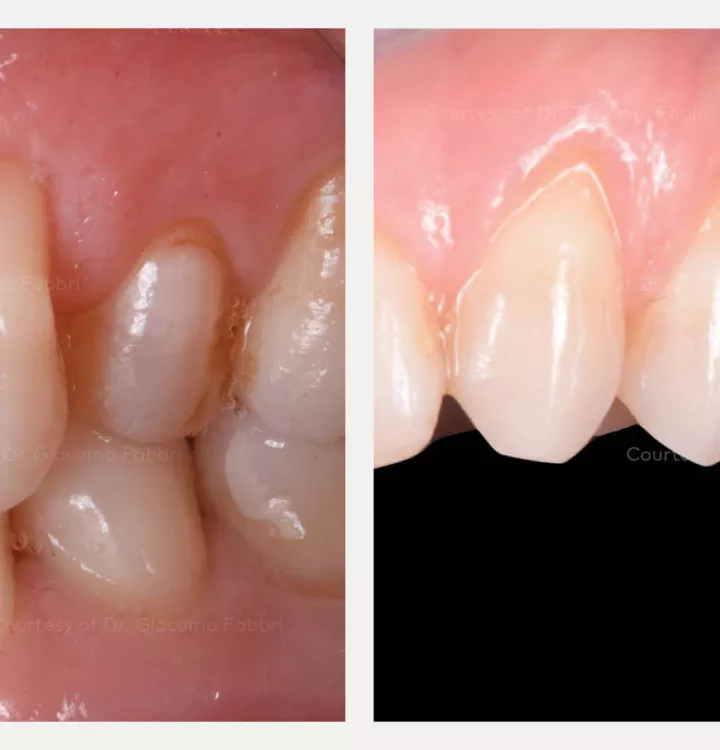
Initial situation and the final result.

Initial situation and the final result: Cinical views show excellent tissue stability.

Outcome

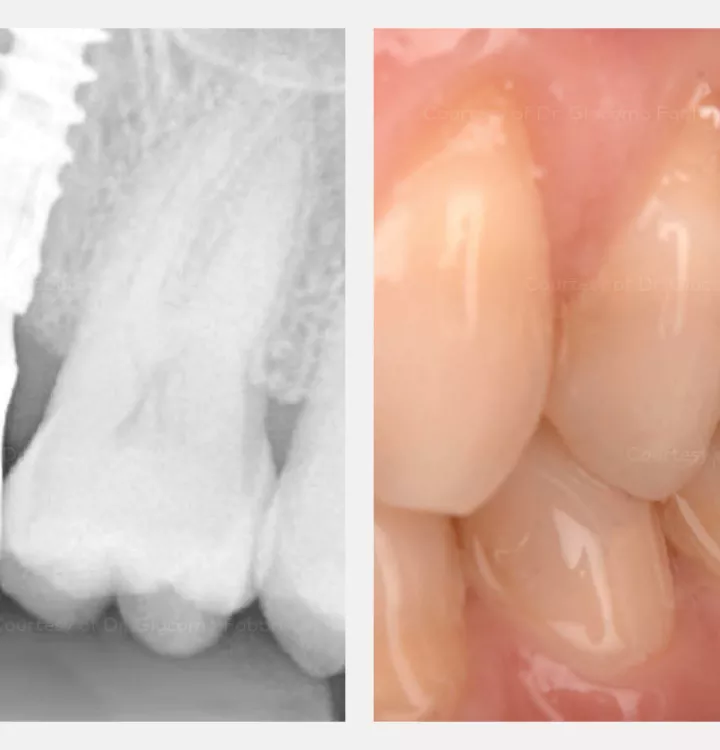
X-ray and clinical evaluation after 9 months of function.

X-ray and clinical evaluation after 9 months of function. Note the excellent bone and soft tissue health.

Related products

  • Universal Base

    Universal Base

    Universal Base - abutments, made your way. Versatility you can base your success on.

  • TempShell

    TempShell

    Screw-retained CAD/CAM provisional at the day of surgery. Collaborative digital workflows.

  • DTX Studio suite

    DTX Studio™ suite

    Nobel Biocare products are seamlessly supported through DTX Studio suite, a single open platform that connects the latest solutions and technology– from patient imaging acquisition to diagnostics planning, implant surgery and restoration.

Sign up for our blog update

Get the latest clinical cases, industry news, product information and more.

© Nobel Biocare USA, LLC, 2022. All rights reserved. Nobel Biocare, the Nobel Biocare logotype and all other trademarks are, if nothing else is stated or is evident from the context in a certain case, trademarks of Nobel Biocare. Please refer to nobelbiocare.com/trademarks for more information. Product images are not necessarily to scale. Disclaimer: Some products may not be regulatory cleared/released for sale in all markets. Please contact the local Nobel Biocare sales office for current product assortment and availability. For prescription use only. Caution: Federal (United States) law restricts this device to sale by or on the order of a licensed clinician, medical professional or physician. See Instructions For Use for full prescribing information, including indications, contraindications, warnings and precautions. Nobel Biocare does not take any liability for any injury or damage to any person or property arising from the use of this clinical case. This clinical case is not intended to recommend any measures, techniques, procedures or products, or give advice, and is not a substitute for medical training or your own clinical judgement as a healthcare professional. Viewers should never disregard professional medical advice or delay seeking medical treatment because of something they have seen in this clinical case. Full procedure is not shown. Certain sequences have been cut.